
WordPress测试项目 https://test-re20y.c9users.io/
适合用来学习linux
注册需要Visa信用卡


WordPress测试项目 https://test-re20y.c9users.io/
适合用来学习linux
注册需要Visa信用卡
如有可能,请勿使用openvz的VPS,太他么蛋疼了。

官方提供的解决办法可能不适用于多种情况,比如我的
https://www.bt.cn/bbs/forum.php?mod=viewthread&tid=3049&extra=page%3D1%26filter%3Dtypeid%26typeid%3D10&page=1
例如,我的VPS压根就没有epel源,所以我们先安装一下
系统为centos6
yum install epel-release #EPEL官方源
wget -O /etc/yum.repos.d/CentOS-Base.repo http://mirrors.aliyun.com/repo/Centos-6.repo    #阿里云基础源
wget -O /etc/yum.repos.d/epel.repo http://mirrors.aliyun.com/repo/epel-6.repo    #阿里云epel源
rpm -Uvh http://rpms.famillecollet.com/enterprise/remi-release-6.rpm    #remi源

yum clean all 清理缓存
yum makecache 生成列表
然后安装官方提示的方式安装
wget -O /www/server/panel/certbot-auto http://download.bt.cn/install/certbot-auto.init -T 5

chmod +x /www/server/panel/certbot-auto && /www/server/panel/certbot-auto -n
会出现各种错误,我们一一解决
You are using pip version 8.0.3, however version 9.0.1 is available.
You should consider upgrading via the 'pip install --upgrade pip' command
pip版本太低,我们升级
pip install --upgrade pip安装完后会提示Successfully installed pip-9.0.1
再运行官方的脚本,错误变得更多了
pip prints the following errors:
=====================================================
DEPRECATION: Python 2.6 is no longer supported by the Python core team, please upgrade your Python. A future version of pip will drop support for Python 2.6
Requirement already satisfied (use --upgrade to upgrade): argparse==1.4.0 in ./.local/share/letsencrypt/lib/python2.6/site-packages (from -r /tmp/tmp.WXO6ZH4OPv/letsencrypt-auto-requirements.txt (line 11))
Collecting pycparser==2.14 (from -r /tmp/tmp.WXO6ZH4OPv/letsencrypt-auto-requirements.txt (line 17))
/root/.local/share/letsencrypt/lib/python2.6/site-packages/pip/_vendor/requests/packages/urllib3/util/ssl_.py:315: SNIMissingWarning: An HTTPS request has been made, but the SNI (Subject Name Indication) extension to TLS is not available on this platform. This may cause the server to present an incorrect TLS certificate, which can cause validation failures. For more information, see https://urllib3.readthedocs.org/en/latest/security.html#snimissingwarning.
/root/.local/share/letsencrypt/lib/python2.6/site-packages/pip/_vendor/requests/packages/urllib3/util/ssl_.py:120: InsecurePlatformWarning: A true SSLContext object is not available. This prevents urllib3 from configuring SSL appropriately and may cause certain SSL connections to fail. For more information, see https://urllib3.readthedocs.org/en/latest/security.html#insecureplatformwarning.
  Could not fetch URL https://pypi.python.org/simple/pycparser/: There was a problem confirming the ssl certificate: [Errno 185090050] _ssl.c:330: error:0B084002:x509 certificate routines:X509_load_cert_crl_file:system lib - skipping
  Could not find a version that satisfies the requirement pycparser==2.14 (from -r /tmp/tmp.WXO6ZH4OPv/letsencrypt-auto-requirements.txt (line 17)) (from versions: )
No matching distribution found for pycparser==2.14 (from -r /tmp/tmp.WXO6ZH4OPv/letsencrypt-auto-requirements.txt (line 17))
/root/.local/share/letsencrypt/lib/python2.6/site-packages/pip/_vendor/requests/packages/urllib3
但并不是我们做错了,继续修复
因为我们已经填了很多源,直接yum update
升级成功
Updated:
  libmcrypt.x86_64 0:2.5.8-9.el6         mcrypt.x86_64 0:2.6.8-10.el6         mhash.x86_64 0:0.9.
然后更新下python
yum update python*更新完成
Updated:
  python.x86_64 0:2.6.6-66.el6_8        python-devel.x86_64 0:2.6.6-66.el6_8  python-libs.x86_64 0:2.6.6-66.el6_8
  python-tools.x86_64 0:2.6.6-66.el6_8
Dependency Updated:
  tkinter.x86_64 0:2.6.6-66.el6_8

Complete!
最后我们再运行官方的安装脚本,安装成功
Complete!
Creating virtual environment...
Installing Python packages...
Installation succeeded.
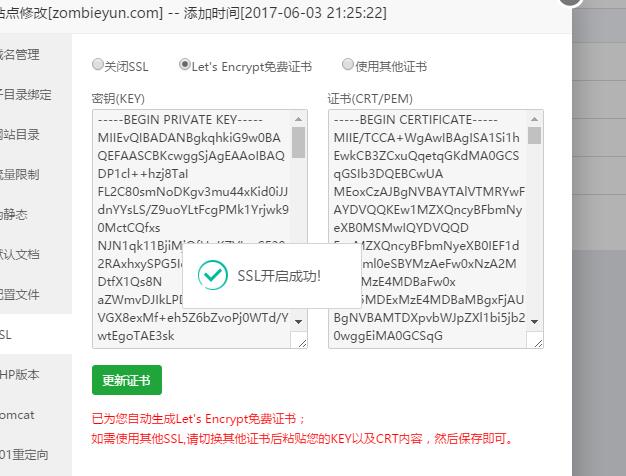
我们从面板点击更新证书,OK

有很多用户跟模板兔反应在wp默认页面注册时,提示点击链接设置密码,可是点击后会提示“要设置您的密码,请访问以下地址:”。这里模板兔提供一个比较死板的方法,就是修改默认的wp-login.php文件。
1.修改wordpress目录下的 wp-login.php文件将
$message .= '<' . network_site_url("wp-login.php?action=rp&key=$key&login=" . rawurlencode($user_login), 'login') . ">\r\n";
修改为:
$message .=network_site_url("wp-login.php?action=rp&key=$key&login=" . rawurlencode($user_login), 'login') . "\r\n";2.wordpress安装目录下的/wp-includes/pluggable.php文件
将:
$message .= '<' . network_site_url("wp-login.php?action=rp&key=$key&login=" . rawurlencode($user->user_login), 'login') . ">\r\n\r\n";修改为:
$message .= network_site_url("wp-login.php?action=rp&key=$key&login=" . rawurlencode($user->user_login), 'login') . "\r\n\r\n";即两个文件代码去掉左右的<,>即可。
当你的WordPress中的文章达到上万篇,随着流量的增加,Wordpress的服务器压力也随之不断加大,Wordpress发布文章和后台相关的操作都会变得缓慢,这时如果单从硬件上投入来提高Wordpress性能显然不划算。
利用Redis将WordPress页面直接缓存在服务器的内存中,这样在避免了PHP重复执行操作的同时,内存的极速响应能够最大限度地提升Wordpress页面的访问速度,实际测试发现页面执行时间可以降低到0.00X秒级别,比没有使用Redis缓存提升几倍甚至十几倍以上。
现在就分享一下折腾教程,很简单(主要是宝塔太强大方便!)
首先,我们要安装redis扩展:
![]()
很简单就可以安装好了,在php那的扩展配置安装即可。
用Predis.php作为Redis的PHP客户端
我们可以使用Predis.php来作为PHP客户端,直接将Predis.php下载并上传到Wordpress的根目录下。
下载Predis.php
安装Redis前端缓存的PHP脚本


速度飕飕滴!
在这推荐几个自己用的和感觉不错的优秀WordPress插件
全站开启HTTP/2协议